3. Basic usage of LAMMPS-GUI
3.1. Command-line options
LAMMPS-GUI supports the following command-line options:
lammps-gui [options] [file]
Option |
Description |
|---|---|
|
Override the editor window width in pixels |
|
Override the editor window height in pixels |
|
Set the visual style of the application (default: |
|
Set the path to the LAMMPS shared library (plugin mode only) |
|
Open |
|
Open |
|
Open |
|
Print version information and exit |
|
Print usage information and exit |
The optional file argument specifies a LAMMPS input file to open on
startup. If no file is provided, LAMMPS-GUI starts with an empty
editor buffer. Available choices for the visual style depend on the
platform and Qt configuration. On most platforms, there is also the
option Windows which is a visual style somewhat resembling
Windows 95.
The -c, -i, and -t flags open a standalone viewer without
the main editor window; they are mutually exclusive with each other and
with the file positional argument.
Added in version 2.1: The -c/--chart, -i/--image, and -t/--text
options were added.
3.2. Launching LAMMPS-GUI
When LAMMPS-GUI starts, it shows the main window, labeled Editor, with either an empty buffer or the contents of the file used as argument. In the latter case it may look like the following:
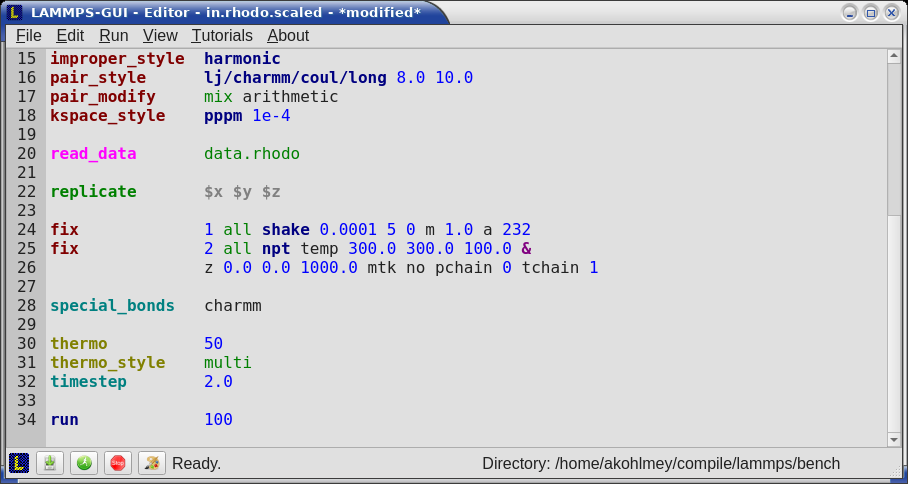
There is the typical menu bar at the top, then the main editor buffer, and a status bar at the bottom. The input file contents are shown with line numbers on the left and the input is colored according to the LAMMPS input file syntax. The status bar shows the status of LAMMPS execution on the left (e.g. “Ready.” when idle) and the current working directory on the right. The name of the current file in the buffer is shown in the window title; the word *modified* is added if the buffer edits have not yet been saved to a file. The geometry of the main window is stored when exiting and restored when starting again.
3.3. Opening and saving files
The LAMMPS-GUI application can be launched without command-line arguments and then starts with an empty buffer in the Editor window.
If a file argument is given, LAMMPS-GUI will use it as the file name for
the Editor buffer and read its contents into the buffer, provided a
file of that name exists; otherwise the buffer will be empty, but set up
to save any added content to that file. Files can also be opened via the
File menu, the Ctrl-O (Command-O on macOS) keyboard shortcut or by
drag-and-drop of a file from a graphical file manager into the editor
window. If a file extension (e.g. .lmp) has been registered with
the graphical environment to launch LAMMPS-GUI, an existing input file
can be launched with LAMMPS-GUI through double clicking.
Only one file can be edited at a time, so opening a new file with a file already loaded into the buffer closes that buffer. If the buffer has unsaved modifications, you are asked to either cancel the operation, discard the changes, or save them. A buffer with modifications can be saved any time from the File menu, by the keyboard shortcut Ctrl-S (Command-S on macOS), or by clicking on the Save button at the very left in the status bar.
3.4. Running LAMMPS
From within the LAMMPS-GUI main window LAMMPS can be started either from the Run menu using the Run LAMMPS from Editor Buffer entry, by the keyboard shortcut Ctrl-Enter (Command-Enter on macOS), or by clicking on the green Run button in the status bar. All of these operations cause LAMMPS to process the entire input script in the editor buffer, which may contain multiple run or minimize commands.
LAMMPS runs in a separate thread, so the GUI stays responsive and is able to interact with the running calculation and access data it produces. It is important to note that running LAMMPS this way uses the contents of the input buffer for the run (internally by calling the lammps_commands_string function of the LAMMPS C-library interface), and not the original file it was read from. Thus, if there are unsaved changes in the buffer, they will be used. As an alternative, it is also possible to run LAMMPS by reading the contents of a file from the Run LAMMPS from File menu entry or with Ctrl-Shift-Enter. This option may be required in some rare cases where the input uses some functionality that is not compatible with running LAMMPS from a string buffer. For consistency, any unsaved changes in the buffer must be either saved to the file or undone before LAMMPS can be run from a file.
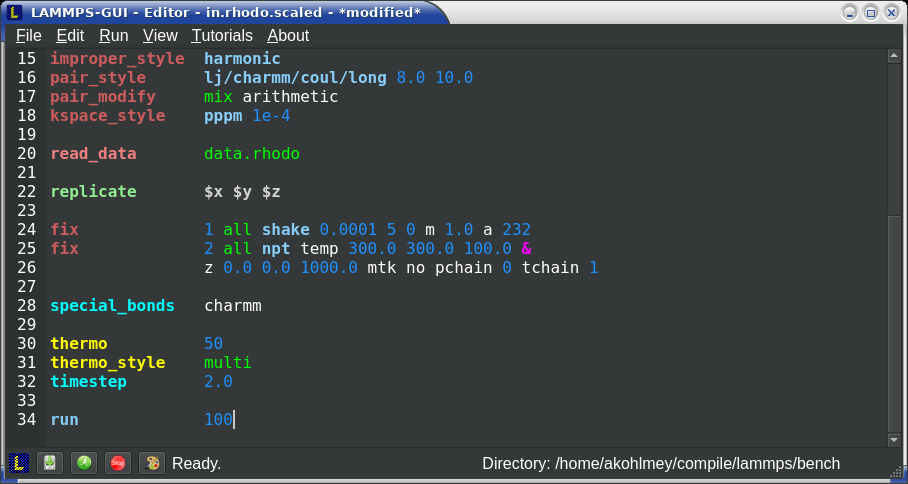
The line number of the currently executed command is highlighted in green in the line number display for the Editor Window.

While LAMMPS is running, the contents of the status bar change. The text fields that normally show “Ready.” and the current working directory change into an area showing the CPU utilization in percent. Next to it is a text indicating that LAMMPS is running, which also indicates the number of active threads (in case thread-parallel acceleration was selected in the Preferences dialog). On the right side, a progress bar is shown that displays the estimated progress for the current run or minimize command.
CPU Utilization
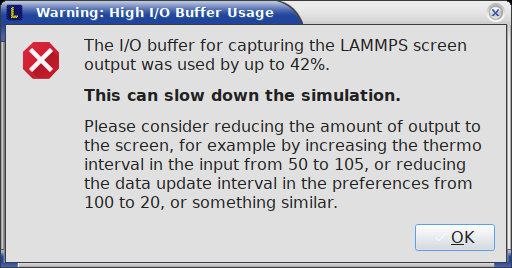
The CPU Utilization should ideally be close to 100% times the number of threads like in the screenshot image above. Since the GUI is running as a separate thread, the CPU utilization may be higher, for example when the GUI needs to work hard to keep up with the output produced by the simulation. This can occur when there is frequent thermo output or the simulation runs very fast. In the Preferences dialog, the polling interval for updating the Output and Charts windows can be adjusted. The intervals may need to be lowered to avoid missing data between Chart data updates or to avoid stalling when the thermo output is not transferred to the Output window fast enough. You could also make LAMMPS run slower by reducing or turning off thread parallelization. It is also possible to reduce the amount of data by increasing the thermo interval. LAMMPS-GUI detects if the associated I/O buffer is significantly full, and will print a warning after the run with suggested adjustments. The CPU utilization can also be lower than expected when some significant parts of the code paths in use are not multi-threaded, or when the simulation is slowed down by the GUI or other processes also running on the host computer and competing with LAMMPS-GUI for resources.
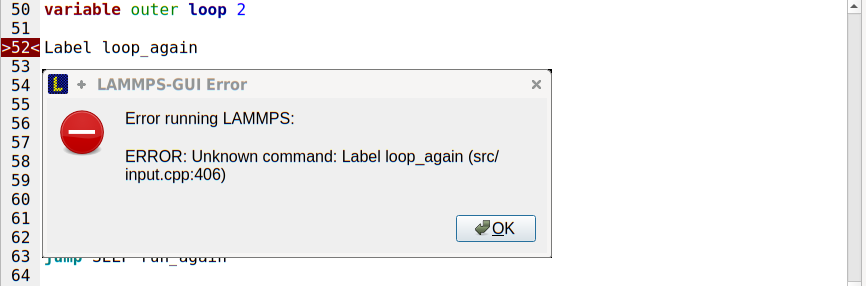
If an error occurs (in the example below the command label was incorrectly capitalized as “Label”), an error message dialog is shown and the line of the input which triggered the error is highlighted in red. The state of LAMMPS in the status bar is set to “Failed.” instead of “Ready.”
Up to three additional windows may open during a run:
An Output window with the captured screen output from LAMMPS
A Charts window with a line graph created from thermodynamic output of the run
A Slide Show window with images created by a dump image command in the input
More information on those windows and how to adjust their behavior and contents is given in the next pages.
An active LAMMPS run can be stopped cleanly by using either the Stop LAMMPS entry in the Run menu, the keyboard shortcut Ctrl-/ (Command-/ on macOS), or by clicking on the red button in the status bar. This will cause the running LAMMPS process to complete the current timestep (or iteration for energy minimization) and then complete the processing of the buffer while skipping all run or minimize commands. This is equivalent to the input script command timer timeout 0 and is implemented by calling the lammps_force_timeout function of the LAMMPS C-library interface. Please see the corresponding documentation pages to understand the implications of this operation.